Sometimes the easiest way to save a copy of something is to simply take a snapshot of your screen. Windows 7 has built-in feature called the Snipping Tool, which captures a screen shot of anything on your desktop, like a picture or a section of webpage. Snip a whole window, a rectangular section of the screen, or draw a freehand outline with your mouse. Then you can annotate, save, or e-mail the image using buttons right in the Snipping Tool window.
To Capture & Email a Screenshot
-
Open Snipping Tool by clicking the Start button
 , clicking All Programs, clicking Accessories, and then clicking Snipping Tool.
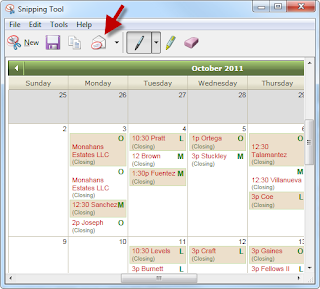
- Click the arrow next to the New button, select a snip type from the menu, and then use your mouse to capture a snip.
- Once you capture a snip, it will automatically open in Snipping Tool. From there you can click the Send Snip button (looks like an envelope) and it will automatically open a new email that contains the image.
To see a short video of the Snipping Tool in action, visit http://windows.microsoft.com/en-US/windows7/products/features/snipping-tool
No comments:
Post a Comment
Note: Only a member of this blog may post a comment.